Minecraft is a game filled with endless possibilities, especially when it comes to building and decorating. With so many different blocks to choose from, it can be overwhelming to decide which ones to use.
One way to make the selection process easier is to categorize the blocks by color. Today, we will focus on the white blocks and explore their various uses and how to acquire them. So, without further ado, let’s dive into the world of white blocks in Minecraft.

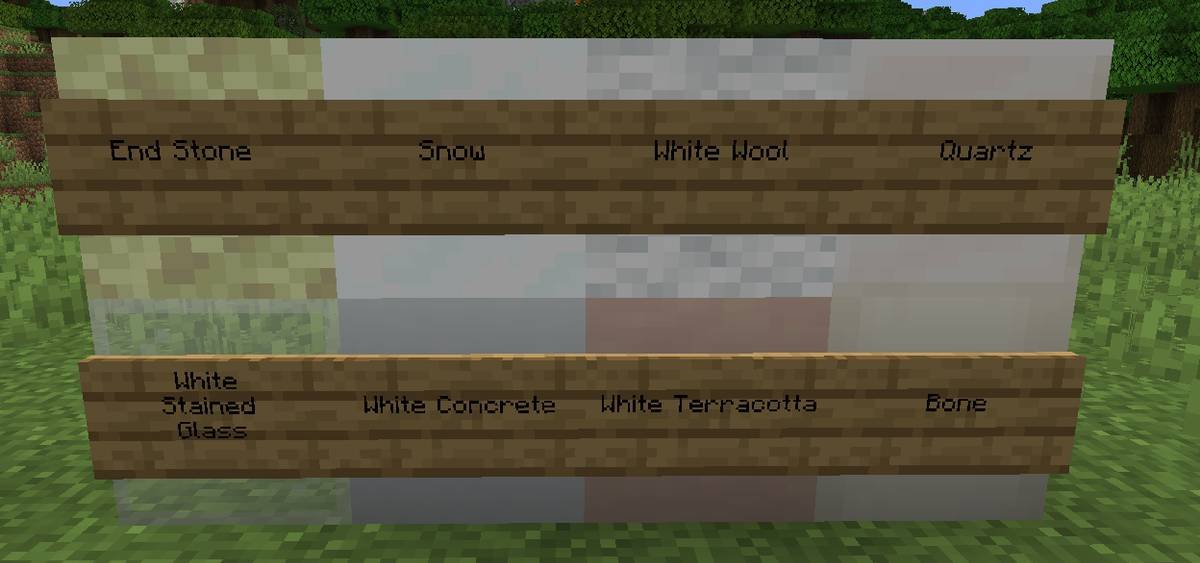
Below, you will find a detailed overview of various blocks, demonstrating their unique characteristics and diverse variations. For instance, you can explore variations such as Chiseled Quartz Block or End Stone Brick Slabs.
Discover the Bone Block

It might be surprising that the Bone block is not the first block we encounter, but that’s because the order follows an alphabetic sequence. However, Bone blocks are actually derived from Bone Meal. This item is known for its ability to accelerate the growth of plants and vegetables. But did you know that it can also be used to create White Dye? In this article, we will explore the fascinating process of utilizing White Dye to transform the color of various other blocks.
Bone Meal is a highly useful item that can be obtained by collecting Bones, which are commonly dropped by Skeletons when defeated.
As one of the most sought-after items in the game, Bone Meal serves multiple purposes and can greatly enhance your gameplay experience. Whether you’re a seasoned player or just starting out, understanding how to obtain and use Bone Meal can greatly benefit your progress.
Achieving victory over Skeletons is a thrilling adventure in itself. Once you have successfully defeated these formidable foes, you will be rewarded with Bones. With a little ingenuity, you can convert these Bones into Bone Meal, which has a plethora of applications.
Use Bone Meal to fertilize your crops and accelerate their growth, allowing you to produce bountiful harvests in a fraction of the time. This invaluable resource can also be employed in gardening and horticulture, transforming barren landscapes into vibrant, flourishing gardens.
Furthermore, Bone Meal can be used as a potent crafting ingredient. Its versatility extends to the creation of dyes, serving as an essential component for light gray and bonemeal white dyes. These beautiful pigments can be used to customize various items, such as wool, leather armor, and banners, allowing you to personalize your creations to your heart’s content.
So, venturing out into the world, defeating Skeletons, and collecting Bones is not only an exciting endeavor but also a pathway to acquiring the precious and versatile Bone Meal. Embrace the challenge, harness the power of Bone Meal, and unlock a myriad of possibilities in your Minecraft journey!

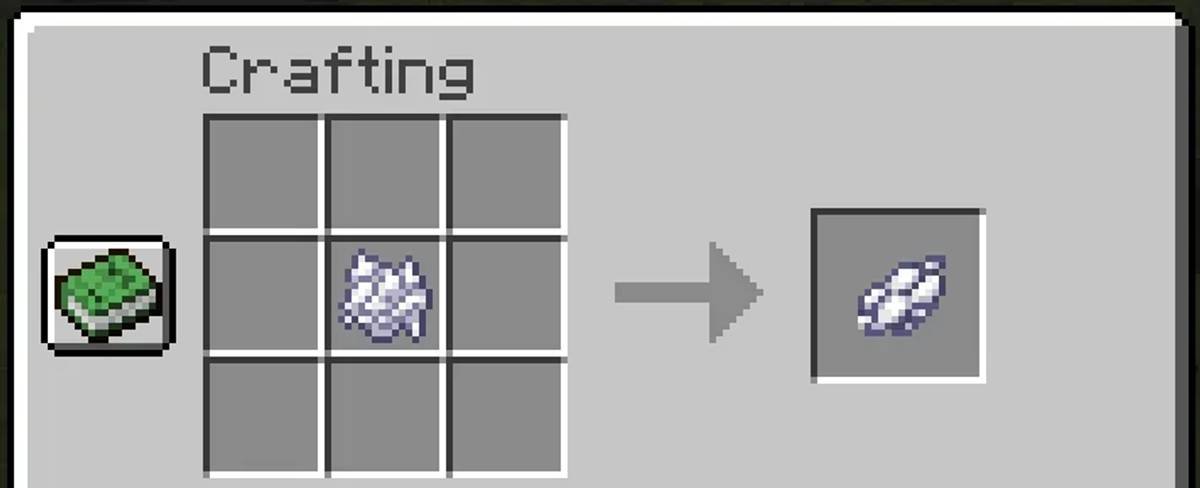
When you want to create Bone blocks in Minecraft, it’s as easy as putting 9 Bone Meals in the Crafting Table. This simple process allows you to transform these items into solid blocks that can be used for various purposes within the game.

Bone blocks are a natural occurrence in various biomes such as the Desert, Swamp, and Soul Sand Valley (found in the Nether). These blocks are part of the fossil structures that can be found in these biomes.
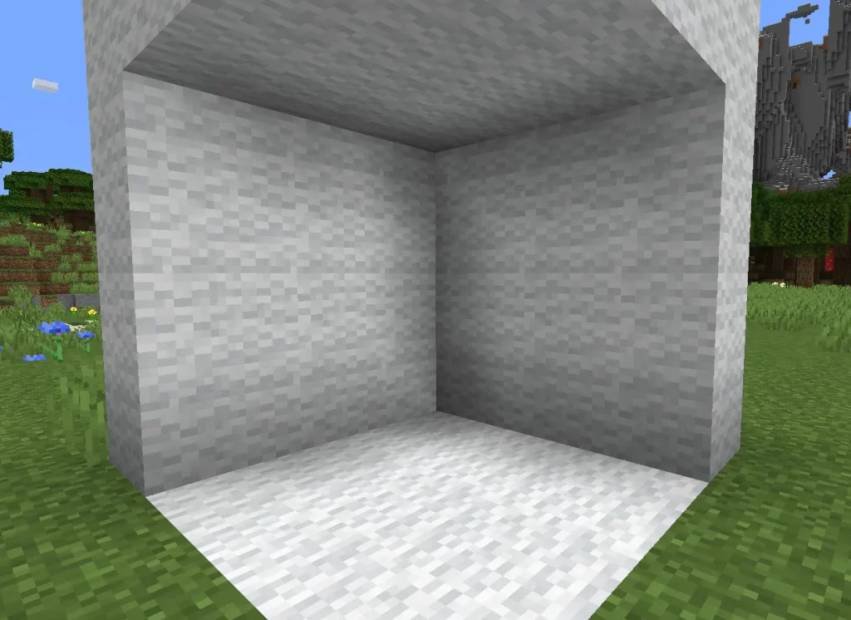
Take a look at the first screenshot to see the distinctive appearance of bone blocks. They have a different top and bottom side, but you can also place them horizontally to change their overall look.
Discover the Beauty of White Terracotta
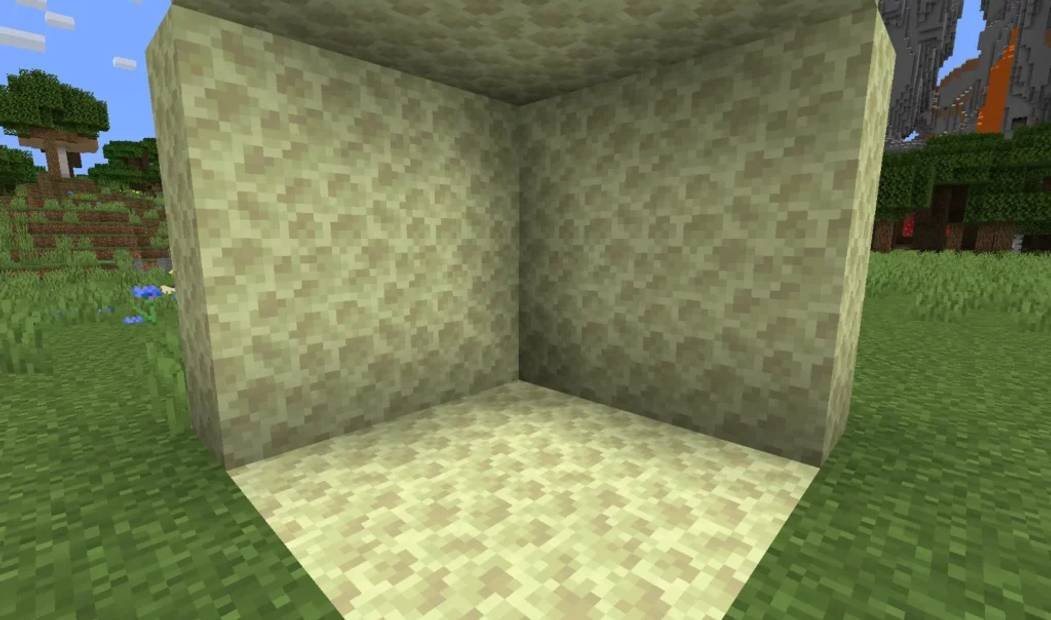
While white terracotta claims to be white, it actually leans towards a pinkish hue when compared to other blocks. Nonetheless, it still deserves a place on the list due to its name and the unique charm it brings to any construction project.

If you’re looking for White Terracotta in your Minecraft adventure, the Badlands biome is the place to go. You’ll find an abundance of this beautiful white block, perfect for adding a touch of elegance to your builds. Alternatively, if you’re near a body of water, keep an eye out for Clay. Smelt it in a Furnace, and you’ll obtain regular Terracotta, which can also be utilized to great effect. As an added bonus, check out the Clay trick to find Diamonds in Minecraft in 2022!

If you’re looking to turn your Terracotta tiles white, you can easily do so by using White Dye.

Why White Wool is a Must-Have for Crafters
White wool is a versatile and essential material for crafters of all levels. Whether you are into knitting, crocheting, or other fiber arts, white wool is a staple that should not be overlooked.
One of the main reasons white wool is so popular is its pristine and clean appearance. The color white is timeless and elegant, making it an ideal choice for creating various projects. Whether you want to make a cozy sweater, a soft blanket, or a delicate doily, white wool will always give your creations a touch of class.
Another advantage of white wool is its compatibility with other colors. It serves as a neutral base, allowing you to combine it with any other shade on the color wheel. Whether you want to create a bold and colorful design or a subtle and monochrome piece, white wool can be your go-to companion.
Furthermore, white wool is known for its exceptional quality and softness. When working on your projects, you want your materials to be comfortable and pleasant to touch. White wool provides that luxurious feeling, making your finished items not only visually appealing but also delightful to use.
Lastly, white wool is easy to find and comes in a wide range of options. From fine merino wool to chunky alpaca wool, you can choose the type of white wool that best suits your project’s needs. Additionally, most craft stores and online retailers offer a variety of white wool options, ensuring that you can always find the perfect match.
In conclusion, white wool is a must-have material for crafters due to its versatility, compatibility with other colors, exceptional quality, and availability. Whether you are a beginner or an experienced crafter, having white wool in your stash will open up a world of possibilities for your creative endeavors.
White Wool is an essential block in Minecraft that you will likely obtain early on in your gameplay. It is a crucial ingredient for making a Bed, which provides a valuable respawn point. There are two main ways to acquire White Wool.
The first method is by obtaining it as loot when you kill Sheep. This means that as you explore the game world, you may come across Sheep and have the opportunity to obtain White Wool from them.
If you don’t have access to Sheep or simply want another way to acquire White Wool, you can craft it using 4 Strings. Strings can be obtained by killing Spiders or by breaking Cobwebs with a Sword. So, even if you haven’t encountered any Sheep yet, you can still progress and create White Wool using these alternative methods.
Remember, White Wool is a versatile block that can be used for various purposes in your Minecraft adventures. Whether it’s crafting decorations, building structures, or creating cozy beds, White Wool is a valuable resource that you will certainly find useful.

Mushroom Stem: The Unsung Hero of Culinary Delights
When it comes to cooking with mushrooms, most people tend to focus on the caps. However, it’s time to shed some light on the underrated hero of the mushroom world – the stem! The mushroom stem not only adds a depth of flavor but also provides a delightful texture that can elevate any dish to new heights of culinary delight.
One of the best ways to make the most of mushroom stems is by using them in stocks and broths. Their earthy flavor adds a rich and robust taste, making your soups and sauces irresistibly delicious. Simply chop the stems finely and simmer them with other ingredients to create a depth of flavor that will leave your taste buds craving for more.
Don’t let the mushroom stems go to waste when making stuffed mushrooms. Finely chop them and mix them with other ingredients like breadcrumbs, herbs, and cheese. This mixture can be used to stuff the mushroom caps, creating a symphony of flavors and textures that will impress even the most discerning palates.
When it comes to stir-fries and sautés, don’t forget to include the mushroom stems. Slice them thinly and cook them along with the caps for a delectable combination. The stems add a satisfying chewiness that complements the tender caps perfectly, creating a harmonious balance of textures that will have you coming back for seconds.
Next time you find yourself cooking with mushrooms, remember to give the stems the attention they deserve. Their unique flavor and texture can take your culinary creations to new heights. So, embrace the mushroom stem and let it shine in your dishes, and you’ll be amazed at the incredible depth of flavor it brings.

If you want to obtain Mushroom Stem blocks in Minecraft, your best option is to break a Huge Mushroom. To learn more details about obtaining Mushroom blocks in the game, refer to our article on “How to get Mushroom blocks in Minecraft?”.
Huge Mushrooms can typically be found in the Dark Forest and Mushroom Fields biomes. Additionally, you can accelerate the growth of normal Mushrooms into Huge Mushrooms by using Bone Meal on them.
End Stone
If you’re looking for a good source of End Stone in Minecraft, head to the End dimension. By exploring the End, you’ll find an abundance of this unique block. However, if you’re not yet prepared to face the formidable End Dragon, you have alternative options. By utilizing commands, you can easily teleport to the End (as detailed in our comprehensive guide, “Everything about End Rod”). This allows you to access the End Stone without having to face the boss battle.
Once you have obtained End Stone, take advantage of its versatility. One of the crafting possibilities is End Stone Brick, which is another attractive white block that you can use for your structures. Adding the End Stone Brick to your inventory opens up new possibilities for designing and building in Minecraft.

Discover the Power of Mac Screenshot Shortcuts
Are you ready to unlock the full potential of your Mac computer? With its sleek design and cutting-edge features, Mac offers more than just a stylish and user-friendly interface. One of its standout features is the ability to capture high-quality screenshots with ease.
With Mac screenshot shortcuts, you can quickly and effortlessly capture anything on your screen and then modify or share it as you see fit. Whether you want to capture an entire webpage, a specific window, or just a small section of your screen, Mac has you covered.
So how do you unleash this power? It’s as simple as pressing a few keys. The secret lies in using the Shift, Command, and number keys. These powerful shortcuts are the key to unlocking a world of possibilities when it comes to capturing screenshots on your Mac.
Let’s break it down:
1. Capture the entire screen: Press Shift + Command + 3 to capture the entire screen in an instant. Whether you want to capture a stunning landscape, an inspiring quote, or an important document, the full screen screenshot is your go-to option.
2. Capture a specific window: Want to capture just a single window? No problem. Press Shift + Command + 4 and your cursor will turn into a crosshair. Simply click on the window you want to capture, and voila! Mac will take care of the rest.
3. Capture a section of your screen: If you only need to capture a specific portion of your screen, the Shift + Command + 4 shortcut is your best friend. Simply drag the crosshair to select the desired area, and release the mouse button. Your selected portion will be captured and ready for editing or sharing.
And that’s not all! Mac offers even more options for advanced screenshotting. For instance, you can add a timer to your screenshot by pressing Shift + Command + 5. This is particularly handy if you need to capture a menu or tooltip that disappears quickly.
Ready to take your screenshots to the next level? Mac screenshot shortcuts are here to help. Start capturing, editing, and sharing your favorite moments and important information with confidence and ease.

If you have End Stone Brick in your inventory, you can use it to craft End Stone Brick Slabs and Stairs. These building blocks are perfect for adding variety and depth to your structures in the Minecraft game.
Mastering Mac Screenshot Shortcuts: Capture and Share with Ease!
Are you tired of fumbling around with complicated screenshot tools on your Mac? Look no further – we’ve got you covered! With the built-in feature on every Mac computer, you can effortlessly capture high-quality screenshots and modify or share them according to your needs. Whether you want to capture the entire screen, a specific window, or just a section of it, Mac provides the flexibility and convenience you crave.
So, what’s the secret behind these super-quick screen captures? It’s all about the Shift, Command, and number keys. By combining these three powerful keys, you can easily trigger different screenshot techniques and become a pro in no time.
Let’s dive into the different Mac screenshot shortcuts you can use:
1. Capture the Entire Screen
If you want to capture everything that’s on your Mac’s display, simply press Shift + Command + 3. That’s it! Your screenshot will be saved as a file on your desktop, and you can access it whenever you need.
2. Capture a Single Window
Do you only want to capture a specific window, such as a browser tab or a dialogue box? No problem! Just press Shift + Command + 4 and hover over the window you want to capture. As soon as the window is highlighted, click your mouse or trackpad, and voila! Your screenshot will be instantly saved.
3. Capture a Section of the Screen
If you prefer to capture only a portion of your screen, the Mac screenshot shortcuts have got you covered too! Press Shift + Command + 4, and your cursor will turn into a crosshair. Click and drag the crosshair to select the area you want to capture. Once you release the mouse, your selected area will be captured and saved automatically.
Now that you know these fantastic Mac screenshot shortcuts, editing and sharing your screenshots has never been easier. You can highlight important details, crop out distractions, add annotations, and even share your masterpiece on social media or in emails – all with just a few clicks.
So, why bother with complicated third-party tools when you have these fantastic built-in features on your Mac? Start using the Mac screenshot shortcuts today and experience the ultimate convenience and efficiency in capturing and sharing screenshots!

Mac screenshot shortcuts: Capture and share your screen effortlessly
As a Mac user, you have the power to capture and share high-quality screenshots with ease. Whether you want to capture the entire screen, a specific window, or just a section of it, Mac offers a range of convenient shortcuts to make the process quick and effortless.
One of the key shortcuts every Mac user should know is the combination of the Shift, Command, and number keys. These keys can be used in various combinations to achieve different screenshotting techniques that suit your needs.
For instance, if you want to capture the entire screen, simply press Shift + Command + 3. The screenshot will instantly appear on your desktop as a high-resolution image. If you prefer to capture a specific window instead, press Shift + Command + 4, and then press the spacebar. Your cursor will turn into a camera icon, allowing you to click on the desired window to capture it.
But what if you only want to capture a specific section of your screen? No worries, Mac has got you covered. By pressing Shift + Command + 4, you can drag the cursor to select the desired area. As you drag, you’ll see a rectangular area highlighted in a translucent shade, indicating what will be captured.
Once you’ve captured your screenshot, it’s time to take advantage of Mac’s built-in editing features. With just a few clicks, you can crop, resize, annotate, or add text to your screenshot. This gives you the freedom to highlight important details or blur out sensitive information before sharing the image.
Sharing your screenshots is as simple as drag and drop. You can easily attach them to emails, add them to presentations or documents, or even upload them to social media platforms. With Mac’s seamless integration with various applications, sharing and utilizing your screenshots has never been easier.
So, whether you’re a student preparing a presentation, a designer showcasing your work, or a professional providing technical support, mastering Mac’s screenshot shortcuts is a must. Utilize these shortcuts to capture, edit, and share your screen effortlessly, and enhance your productivity and communication.

Discover the Power of Mac Screenshot Shortcuts
As a Mac user, you have the incredible ability to capture stunning screenshots with ease. Whether you want to capture the entire screen, a specific window, or just a portion of it, Mac provides a range of convenient shortcuts to streamline your screenshotting process.
By mastering the clever combination of Shift, Command, and number keys, you can effortlessly capture and save any visual information on your screen. Gone are the days of struggling to capture the perfect screenshot – Mac empowers you to do it with precision and efficiency.
Want to capture your entire screen? Simply press Shift, Command, and the number 3 key simultaneously, and voila! Your screenshot is saved to your desktop, ready to be shared or edited to your heart’s content.
If you prefer to capture a specific window instead, just press Shift, Command, and the number 4 key. Your cursor will transform into a crosshair, allowing you to click and drag it over the desired window. Once you release the mouse, your screenshot will be saved as a file, ready to be accessed whenever you need it.
Need to focus on a particular section of your screen? Mac has you covered. By pressing Shift, Command, and the number 5 key, you will activate the built-in screenshot tool. This handy tool allows you to capture a specific portion of your screen, and even offers additional options such as recording a video or taking a screenshot with a timestamp.
Now that you’re familiar with these powerful Mac screenshot shortcuts, you can take your productivity and creativity to new heights. Whether you’re a student, a professional, or simply someone who loves capturing and sharing visual content, Mac provides the tools you need to enhance your digital experience.
So go ahead, unleash your creativity and start capturing those breathtaking screenshots effortlessly with your Mac!
Mac screenshot shortcuts for capturing and sharing your screen moments
Do you want to capture high-quality screenshots on your Mac with ease? Look no further! Mac computers provide you with built-in features to capture your entire screen, a specific window, or even just a section of it. The best part? It’s all accessible through a few simple keyboard shortcuts.
Ready to become a Mac screenshot pro? Let’s dive into the essential shortcuts you need to know:
Capturing the entire screen
Press Shift + Command + 3 to capture the full screen instantly. The screenshot will be saved on your desktop as a .png file. From there, you can easily view, edit, or share it as desired.
Capturing a specific window
If you only want to capture a specific window, press Shift + Command + 4. Your cursor will turn into a crosshair. Next, click on the window you want to capture. Once you release the mouse button, the screenshot of the window will be saved on your desktop for further use.
Capturing a specific section
If you prefer to capture only a certain section of your screen, press Shift + Command + 4 again. This time, your cursor will turn into a crosshair, allowing you to select the exact portion you want to capture. Simply click and drag to create a customizable screenshot. Once you release the mouse button, the selected section will be saved on your desktop.
These simple yet powerful shortcuts are built into every Mac computer, making it effortless to capture and share your screen moments. Whether you want to highlight an important detail, create tutorials, or share funny conversations, Mac screenshot shortcuts have got you covered.
So, what are you waiting for? Start exploring the world of Mac screenshot shortcuts and capture your screen with confidence!

Snow: A Winter Wonder
Snow is a magical phenomenon that brings joy and wonder to the world. As soft white flakes fall from the sky, they create a picturesque landscape that captures the imagination. From building snowmen and having snowball fights to skiing and snowboarding, there are endless possibilities for fun and adventure in the snow.
Not only is snow a source of enjoyment, but it also holds a vital role in the ecosystem. It provides insulation for plants and animals during the harsh winter months and helps replenish the Earth’s water supply when it melts in the spring.
For those lucky enough to experience snow, it is a sight to behold. The way it transforms familiar surroundings into a winter wonderland is truly breathtaking. Every snowflake is unique, and when they come together to blanket the ground, it creates a serene and peaceful atmosphere.
Whether you’re snuggled up by the fire, watching the snowfall through your window, or out in the midst of a snowstorm, there is a certain magic in the air. The crisp sound of snow crunching beneath your feet, the way it sparkles in the sunlight, and the joy of making footprints in fresh powder – these are the moments that make snow so special.
So, embrace the winter season and all that snow has to offer. Find joy in the simple pleasures it brings and appreciate the beauty it adds to our world. Whether you’re a child or an adult, there is something undeniably enchanting about the wonder of snow.

If you’re interested in learning more about Snow Layers in Minecraft, be sure to read our comprehensive article titled “Everything about Snow Layers”. In this article, we delve into how to locate and utilize this unique block. Snow not only adds a visually appealing element to your builds, but it also offers the fascinating Snow Layer feature. These layers can be stacked up to 8 times to create thicker and more realistic snow formations.

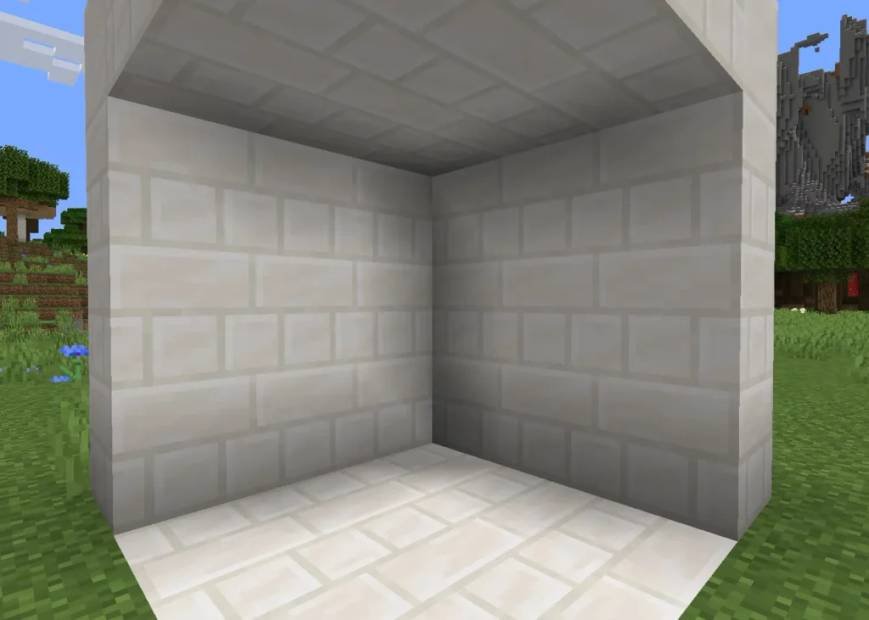
Discover the Magic of Quartz Blocks
Quartz blocks are a fantastic addition to any interior or exterior design project. Their sleek and elegant appearance makes them a popular choice among architects and homeowners alike. Whether you are renovating your kitchen, bathroom, or outdoor space, quartz blocks can elevate the look and feel of any area. One of the most remarkable features of quartz blocks is their durability. Made from natural quartz crystals, these blocks possess incredible strength and resilience. They can withstand heavy foot traffic, extreme temperatures, and daily wear and tear without losing their beauty or functionality. This longevity ensures that your investment in quartz blocks will last for years to come. Not only are quartz blocks durable, but they are also resistant to stains, scratches, and chemicals. This makes them a perfect choice for high-traffic areas or spaces where spills and messes are common. With quartz blocks, you can have peace of mind knowing that your surfaces are protected and easy to clean. Furthermore, quartz blocks come in a wide range of colors, patterns, and textures, allowing you to create a unique and personalized look for your space. Whether you prefer a minimalist and modern aesthetic or a more traditional and timeless design, there is a quartz block style that will suit your taste. Installing quartz blocks is a relatively straightforward process, especially when handled by professionals. Their uniform shape and size make them easy to work with, ensuring a seamless and precise installation. With the help of skilled craftsmen, your dream design can become a reality in no time. In conclusion, quartz blocks offer a beautiful, durable, and versatile solution for any design project. Their strength, resistance to stains, and wide range of options make them highly desirable for both residential and commercial applications. Consider incorporating quartz blocks into your next renovation or construction project, and experience the magic they bring to your space.
If you’re looking to create stunning Quartz blocks in Minecraft, all you need is 4 Nether Quartz. These valuable resources can be easily found in the depths of the Nether, making them accessible for every adventure.

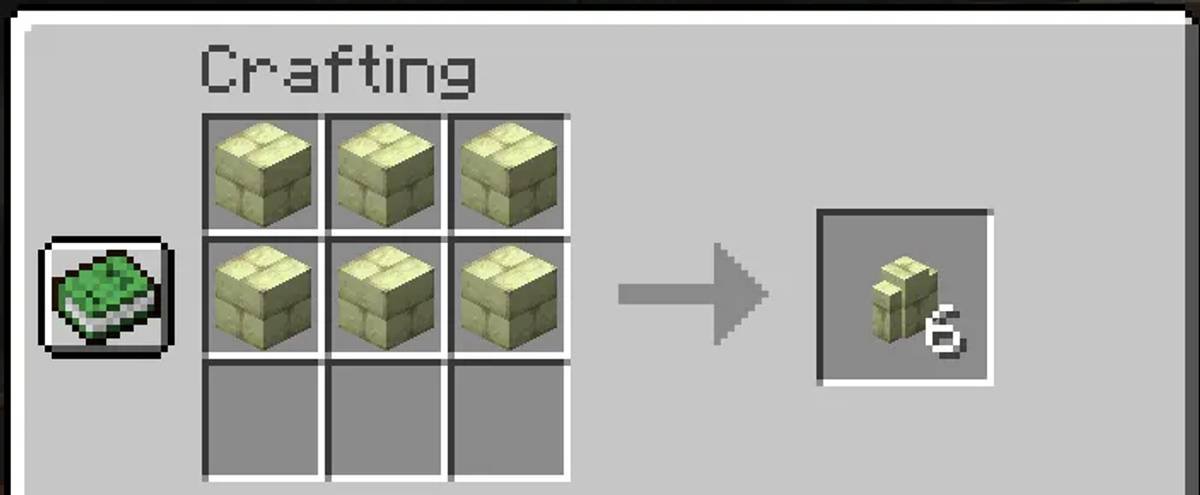
To access different versions of Quartz blocks, you can utilize a Stonecutter. Crafting a Stonecutter requires 3 Stone blocks and 1 Iron Ingot. Obtaining Stone blocks is possible by smelting Cobblestone or by using a Pickaxe enchanted with Silk Touch.

If you are looking to create Chiseled Quartz, the Stonecutter is the tool you need. This handy device allows you to transform regular quartz blocks into beautifully crafted Chiseled Quartz. If you are interested in learning how to make Chiseled Stone Brick using different methods, be sure to check out our related article.

Mastering the Art of Mac Screenshot Shortcuts
Are you ready to take your Mac screenshotting skills to the next level? Look no further! With a few simple keystrokes, you can capture and customize high-quality screenshots on your Mac computer. From capturing the entire screen to focusing on specific windows or sections, the possibilities are endless!
Let’s dive right into the world of Mac screenshot shortcuts. The key players in this game are the Shift, Command, and number keys. These dynamic trio will become your best friends when it comes to capturing those picture-perfect moments on your screen.
Screenshotting the Entire Screen
To capture the entire screen on your Mac, simply press Shift + Command + 3. It’s that easy! The screenshot will be automatically saved as a PNG file on your desktop. Now you can relive those epic gaming moments or keep a record of important information on your screen.
Capturing a Specific Window
If you only want to capture a specific window on your Mac, don’t fret! Just press Shift + Command + 4, and your cursor will transform into a crosshair. Click and drag the crosshair over the desired window to capture it. Release the mouse button, and voila! You now have a perfect screenshot of that particular window.
Selectively Capturing a Section
Feeling a bit more selective? You can easily capture a specific section of your screen using the same Shift + Command + 4 shortcut. Once the crosshair appears, click and drag to draw a rectangle around the desired section. Release the mouse button, and just like magic, you have a screenshot of that precise area.
Edit and Share Your Screenshots
Now that you’ve mastered the art of Mac screenshot shortcuts, it’s time to put these screenshots to good use! Whether you want to annotate, crop, or add text to your screenshots, Mac provides powerful built-in editing tools. Simply double-click on the screenshot file on your desktop or open it in the Preview app.
Once you’re satisfied with your edits, it’s time to share your masterpiece with the world. You can easily attach the screenshot to an email, post it on social media, or incorporate it into your latest blog post. The choice is yours!
So, what are you waiting for? Start experimenting with Mac screenshot shortcuts and unleash your creativity. Capture, edit, and share those incredible moments with ease. Happy screenshotting!
In addition to Quartz blocks and Bone blocks, there is another block called Quartz Pillar that adds variety to your builds. Similar to Bone blocks, Quartz Pillar showcases a distinct appearance on its top and bottom sides. This feature allows you to create intricate designs and add depth to your structures, making them visually stunning.
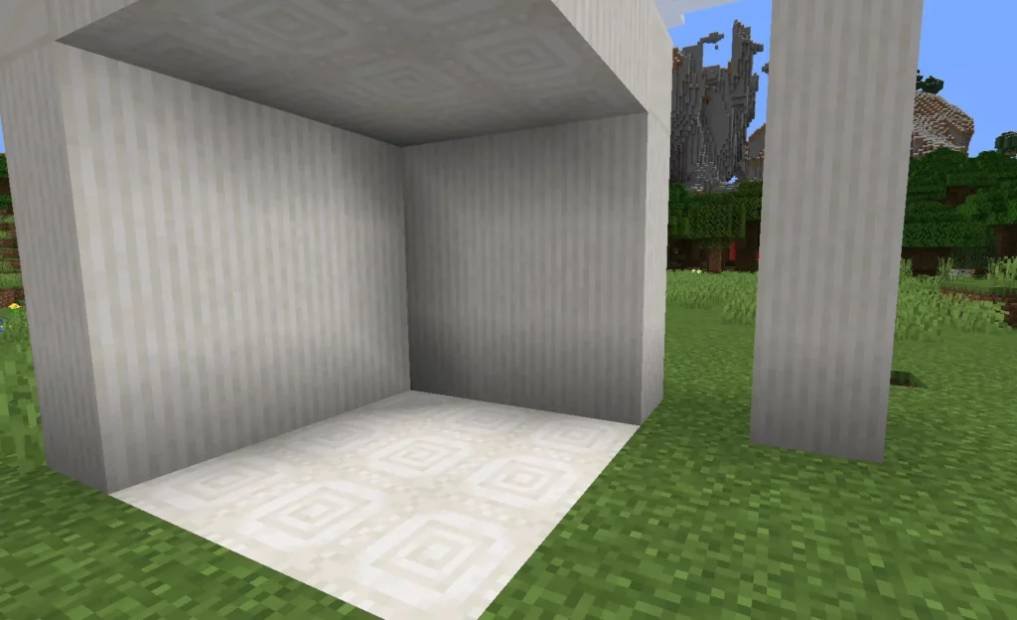
If you are aiming to construct a Greek-style temple, look no further than Quartz Pillar. Its stunning appearance perfectly captures the essence of Greek architecture.
Bring elegance with White Concrete

In order to obtain White Concrete in Minecraft, you will need to make a White Concrete Powder block come into contact with water. This simple process transforms the powder into solid concrete in a beautiful shade of white.
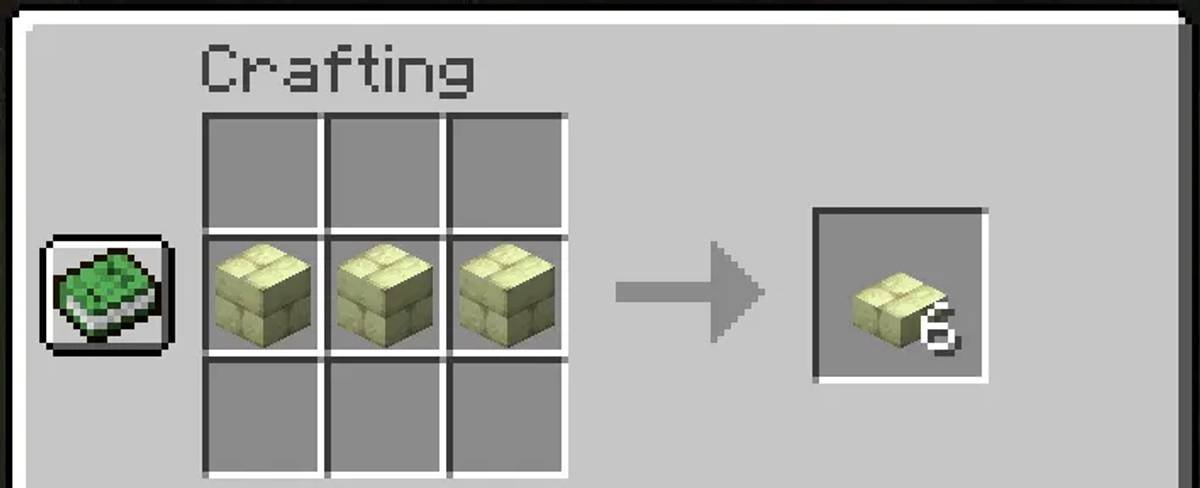
To craft White Concrete Powder, gather 4 blocks of Sand, 4 blocks of Gravel, and 1 White Dye. By mixing these ingredients together in a Crafting Table, you can create White Concrete Powder. If you prefer different colors, you can experiment with various dyes to achieve a wide range of vibrant Concrete options.

Discover the Beauty of White Stained Glass
White stained glass is a stunning and versatile medium that brings a touch of elegance and sophistication to any space. Known for its timeless beauty, white stained glass captures the essence of purity and tranquility, making it a popular choice for both traditional and contemporary designs.
From intricate patterns to simple geometric designs, white stained glass offers endless possibilities for creativity and customization. Whether it’s a delicate floral motif in a church window or a sleek geometric pattern in a modern home, white stained glass adds a touch of visual interest and allure.
One of the main advantages of white stained glass is its ability to create a sense of privacy while still allowing natural light to filter through. This makes it an ideal choice for areas that require both privacy and illumination, such as bathrooms or office spaces.
Another remarkable aspect of white stained glass is its ability to complement various color schemes and design styles. Whether you have a minimalist aesthetic or prefer a more vibrant palette, white stained glass effortlessly blends in, enhancing the overall ambiance of the space.
Furthermore, white stained glass is not limited to windows alone. It can also be used to create stunning partitions, room dividers, lampshades, or even decorative accents for furniture. The versatility of white stained glass allows for endless creative possibilities.
When it comes to maintenance, white stained glass is relatively easy to care for. Regular dusting and occasional cleaning with a mild glass cleaner are usually sufficient to keep it looking pristine for years to come.
In conclusion, white stained glass is a captivating and versatile medium that adds a touch of beauty and elegance to any space. Its ability to blend seamlessly with various design styles, create privacy, and allow natural light to filter through makes it a popular choice among designers and homeowners alike. Consider incorporating white stained glass into your next project and experience the enchantment it brings.

The White Stained Glass is an exceptional block on this list, not only because of its name, but also due to its unique transparency. This block stands out as the sole transparent option among the rest.
To obtain White Stained Glass, all you need to do is combine Glass blocks with White Dye. It’s a straightforward process that results in a beautiful and elegant block.

The Ultimate Guide to Mac Screenshot Shortcuts
Are you a proud Mac owner? Have you ever wanted to capture a perfect screenshot, but didn’t know how? Look no further! In this guide, we will walk you through the most efficient and convenient Mac screenshot shortcuts that will take your screen capturing game to the next level.
On every Mac computer, you have the power to capture high-quality screenshots and customize them to your heart’s content. Whether you want to capture the entire screen, a specific window, or just a section of it, these Mac screenshot shortcuts will make it a breeze.
Shortcut: Shift + Command + 3
This is the big one – the shortcut that captures your entire screen in one go. Simply press and hold Shift, Command, and then hit the number 3 key. Your Mac will instantly capture the full screen and save it as a PNG file on your desktop. No fuss, no hassle – just a perfect screenshot with a single click.
Shortcut: Shift + Command + 4
If you prefer a more precise screenshot, this shortcut is for you. By pressing Shift, Command, and the number 4 key, your cursor will turn into a crosshair. Simply click and drag to select the specific area you want to capture. Once you release the mouse button, your Mac will save the screenshot as a PNG file on your desktop.
Shortcut: Shift + Command + 4 + Spacebar
Want to capture a specific window? This shortcut has got you covered. Press Shift, Command, and the number 4 key just like before, but this time, press the Spacebar. Your cursor will turn into a camera, allowing you to select the window you want to capture. Once you click, your Mac will automatically save the screenshot as a PNG file on your desktop.
These Mac screenshot shortcuts are incredibly handy and will save you time and effort when you need to capture and share that perfect screenshot. Give them a try and see just how easy it is to capture breathtaking images on your Mac!
Leave a Reply
You must be logged in to post a comment.