
If you’re a fan of Baldur’s Gate 3 and love a good murder mystery, then the Open Hand Temple quest is a must-play. In this captivating quest, you’ll unravel the truth behind the murders and bring justice to Brilgor and Father Lorgan. So, let’s dive right into how you can solve the Open Hand Temple murders in Baldur’s Gate 3.
Finding the Open Hand Temple Murder Quest
One of the key aspects of any quest is actually finding it. The Open Hand Temple quest is no exception. To begin your investigation, you’ll need to make your way to the town of Rivington, which you’ll encounter in Act 3 of the game.
Upon entering Rivington, head north, past the circus on your left. Keep following the road until you reach the last building before the crossing. This building is none other than the Open Hand Temple. Look for the group of refugees outside and step inside to speak with Sister Yannis, who will initiate the quest.
Clues and Solutions for the Open Hand Temple Murders
Once inside the Open Hand Temple, you’ll come across a peculiar scene featuring a tiny flying elephant berating a gnome. It appears a murder has taken place, with the elephant proclaiming it to be an open-and-shut case. According to the elephant’s theory, a refugee succumbed to rage, killing Father Lorgan before taking their own life.
However, Sister Yannis believes there is more to this story, and it’s up to you to uncover the truth. Delve deeper into the investigation to find additional clues and solutions that challenge the initial assumptions. Don’t be afraid to question witnesses, explore the surroundings, and piece together the puzzle to reveal what really happened.
So, put your detective hat on and embark on this thrilling quest in Baldur’s Gate 3. The Open Hand Temple awaits your inquisitive mind and unwavering determination to bring justice to those affected by these tragic murders.
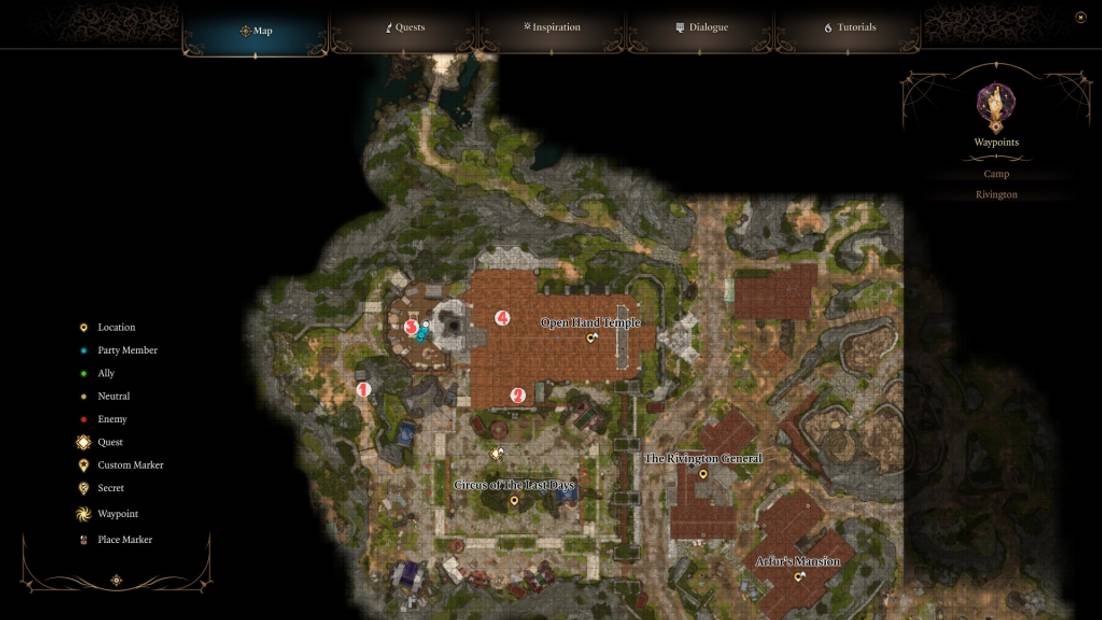
- 1 – Brilgor’s Corpse
- 2 – Father Lorgan’s Corpse
- 3 – Father Lorgan’s Diary
- 4 – Hatch to Cerllar
Clue 1: Speak to Brilgor
If you’re not afraid to tread on sacred grounds, go ahead and speak to the accused murderer, Brilgor. He can be found in the graveyard located to the left of the temple. To reach there, either pass through the back of the temple, past the kitchens and dormitory, or take the route through the Circus of The Last Days and unlock the iron gate. The lock requires a throw of at least 10.
Once you’re in the graveyard, Brilgor’s resting place will stand out from the other graves with a freshly piled mound of dirt. Confirm it’s him by inspecting the tombstone.

Now it’s time to delve into the intriguing world of Baldur’s Gate 3 and uncover the secrets that lie buried beneath. To progress in the game, one crucial step is interacting with the mound and unearthing the casket of Brilgor. If you have a shovel, use it to carefully dig up his casket. Once the casket is open, a menu will appear, allowing you to select Brilgor. Simply drag his profile picture out of the menu and “drop” it on the ground, and watch as he materializes before your eyes in the dirt.
If you don’t possess the Speak with Dead spell, scroll, or potion, fear not! Bring in Shadowheart, one of your companions, as she is likely to have the necessary skill at this point in the game.
Now, it’s time to unravel the mystery surrounding Brilgor’s demise. You have the opportunity to ask him a series of questions. Here are some insightful queries and the responses you can elicit:
- “Who killed you?” – “Dwarf, red clothes, stranger.”
- “Were you alone when you died?” – “Father Lorgan… Helping me…”
- “Why was he helping you?” – “Fists… After me… Needed to hide…”
- “How did you die?” – “Pierced… once… paralyzed.”
- “Where did you die?” – “Tunnels… hidden from sight.”
If you possess the Speak with Dead spell at level 3, you can ask up to a maximum of five questions. However, if your spell level is at 1, prioritize asking “Were you alone when you died?” and “Where did you die?” to gather crucial information.
By now, you should have gathered enough information to progress through the game. However, if you’re hungry for more clues, there’s another avenue to explore.
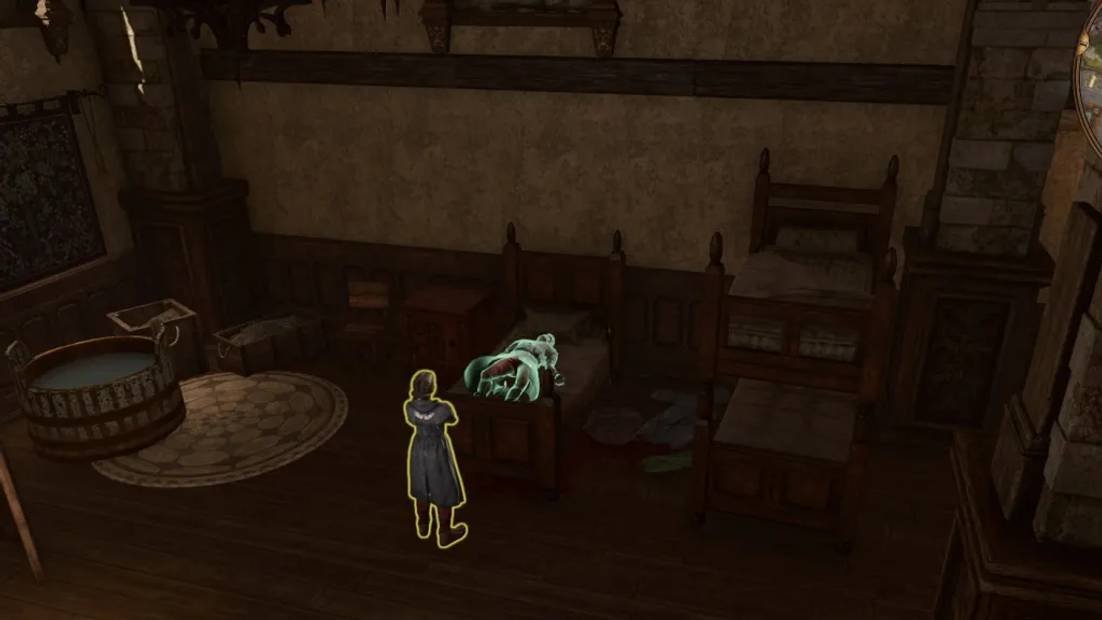
Clue 2: Speak to Father Lorgan
If speaking to the dead is not your style, you can pay a visit to Father Lorgan in the Open Hand Temple. Look for him in the infirmary, alongside Sister Rose the Penitent. When you speak to Sister Rose, she will mention that Father Lorgan was paralyzed and had his right hand severed by the murderer.
Armed with these newfound details, cast Speak with Dead on Father Lorgan. If you don’t possess the spell, Shadowheart should have it in her repertoire to assist you.
Embrace the excitement of uncovering the truth and solving the mysteries that await you in Baldur’s Gate 3!
You have the opportunity to ask Father Lorgan the same questions you asked Brilgor. Here are the answers you can expect:
- “Who killed you?” – Father Lorgan responds, “A dwarf… dressed in red.”
- “Why did he kill you?” – It seems Father Lorgan doesn’t know the answer to this question.
- “What were you doing when you died?” – Father Lorgan reveals, “Hiding… Brilgor… from Fists.”
- “How did you die?” – Father Lorgan discloses, “A poisoned blade. Paralysis.”
- “Where did you hide him?” – Father Lorgan shares, “Took him to the tunnels… with the rest. Fool… fool.”
- “Where were you attacked?” – Father Lorgan admits, “Tunnels from the cellar… refuge.”
Clue 3: The Diary
Don’t forget to check the dormitory to the left of the kitchen for an additional clue. Inside, you’ll find a series of beds, each with a chest in front of them. Make sure to focus on the middle chest, as it requires a lockpick skill of 15, unlike the incorrect ones that only demand a skill level of 10.
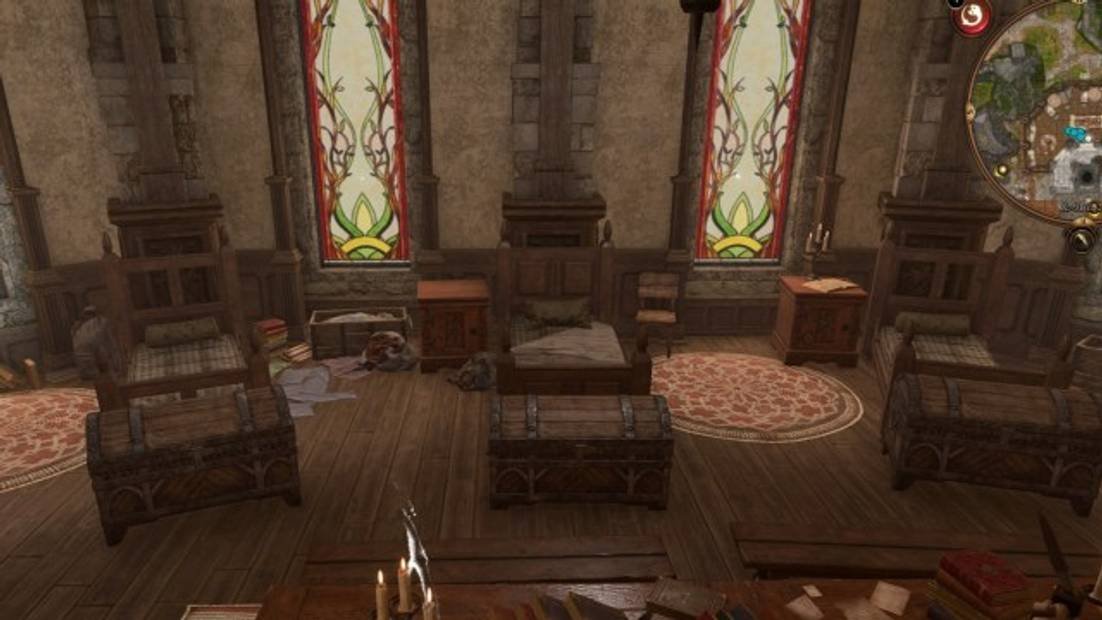
Unlock the hatch using your lockpicking skills, then have a character with a high Investigation skill open it. If you successfully pass the Investigation check, you’ll discover Father Lorgan’s diary, which reveals that it is written from the “temple cellar”.
That’s all there is to it! Honestly, it may not be worth the effort of lockpicking. However, if you didn’t speak to the corpses, this might be your only opportunity to uncover this important information.
Solving the Open Hand Temple Murder
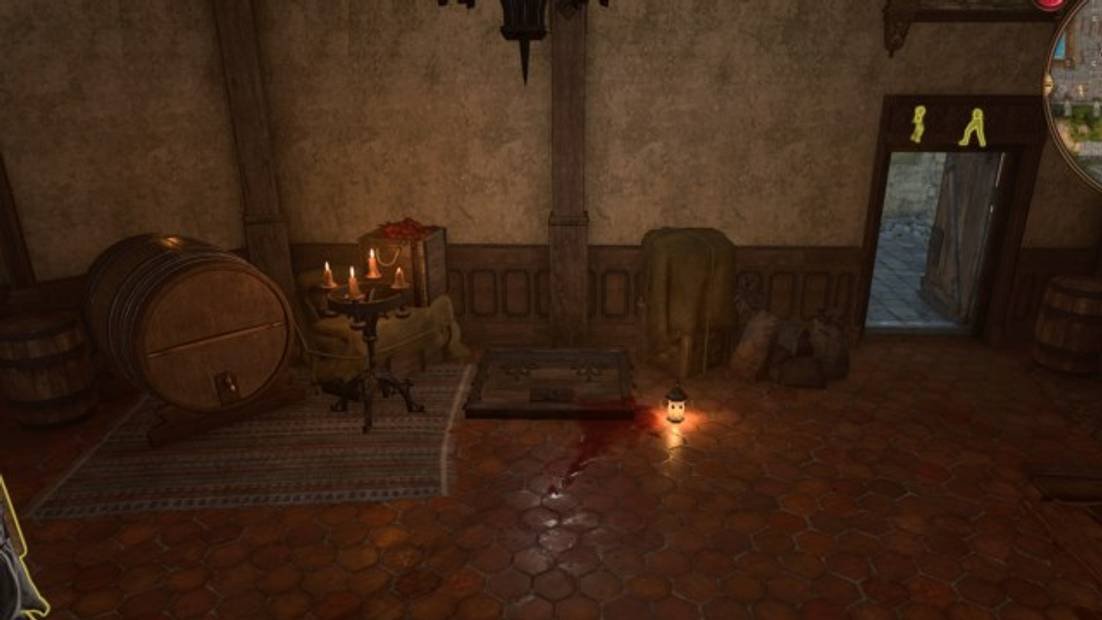
Now that we have gathered all the necessary clues, it’s time to explore the basement.
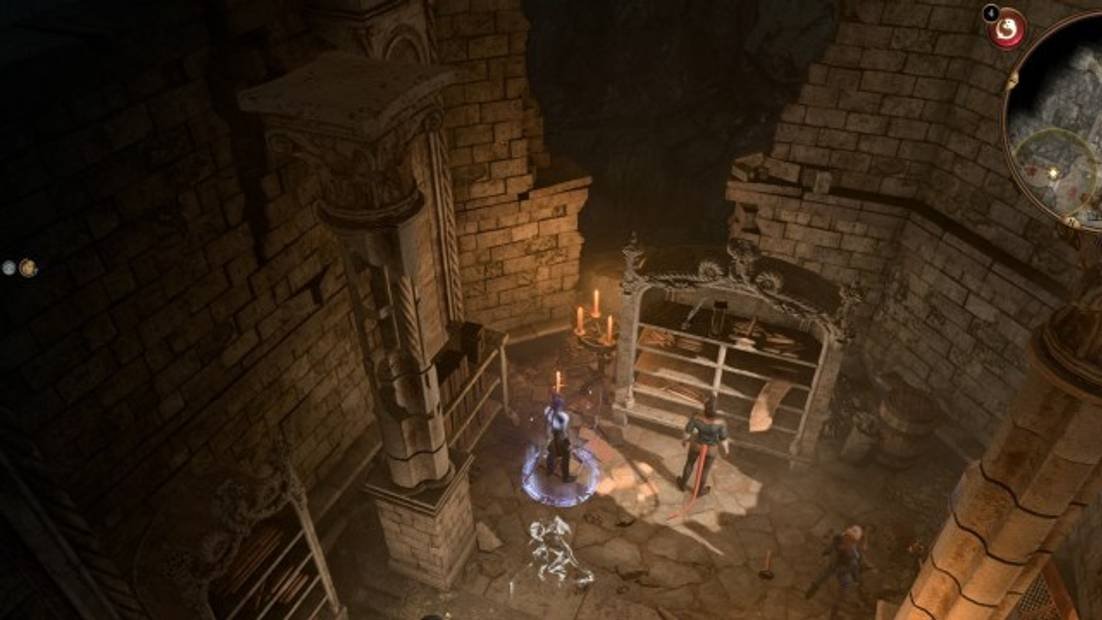
Make your way to the kitchen, where you’ll notice an Ornate Hatch marked with bloodstains. Interact with it to gain access to the cellar.
Upon venturing into the cellar, you will come across three distinct rooms. The first room, known as the main prayer room, serves as the focal point. As you explore further, you may stumble upon the crypt located at the rear of this prayer room. Those on a quest to find the ancestor of the Cursed Monk will be intrigued by the mysteries hidden within.
Continuing your expedition, you will encounter a side room adorned with several bookcases. Pay attention to the trapped display case within this room, although it might not be worthwhile to spend time disarming or lockpicking it. Beware, for the rewards within merely consist of a single potion – the Elixir of Battlemage’s Power. However, it is worth noting that the back wall of this room appears to have crumbled, hinting at possible secrets yet to be discovered.
Prepare to embark on an exciting and adventurous journey as you navigate through mysterious tunnels. With each step, you’ll feel a surge of anticipation and excitement.
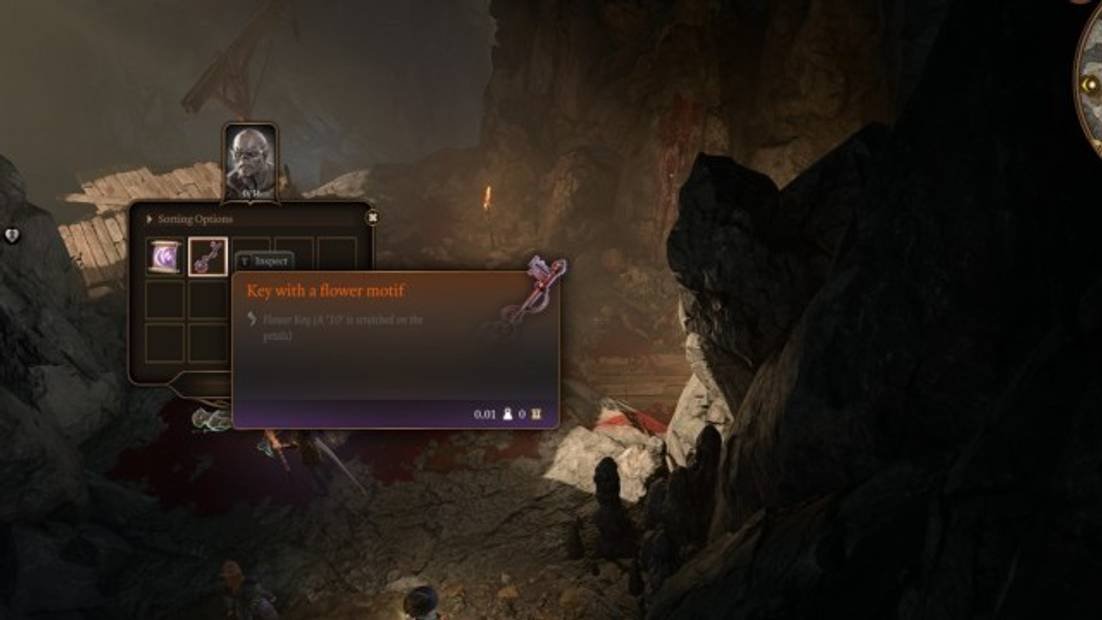
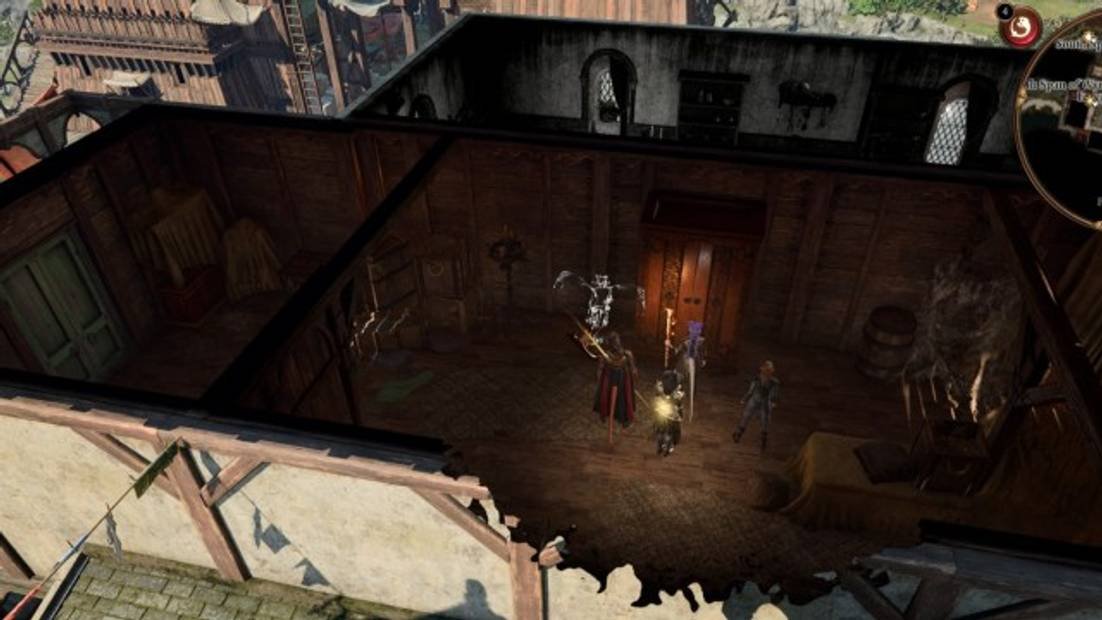
As you progress forward, the sound of distant voices will guide your path. Follow the sound and you’ll stumble upon three doppelgangers. Engage in an epic battle and emerge victorious, claiming the precious Flowery Key from Zomm. This key will play a crucial role in unveiling the hidden room of the murderer, located directly across from the Sharess Caress.
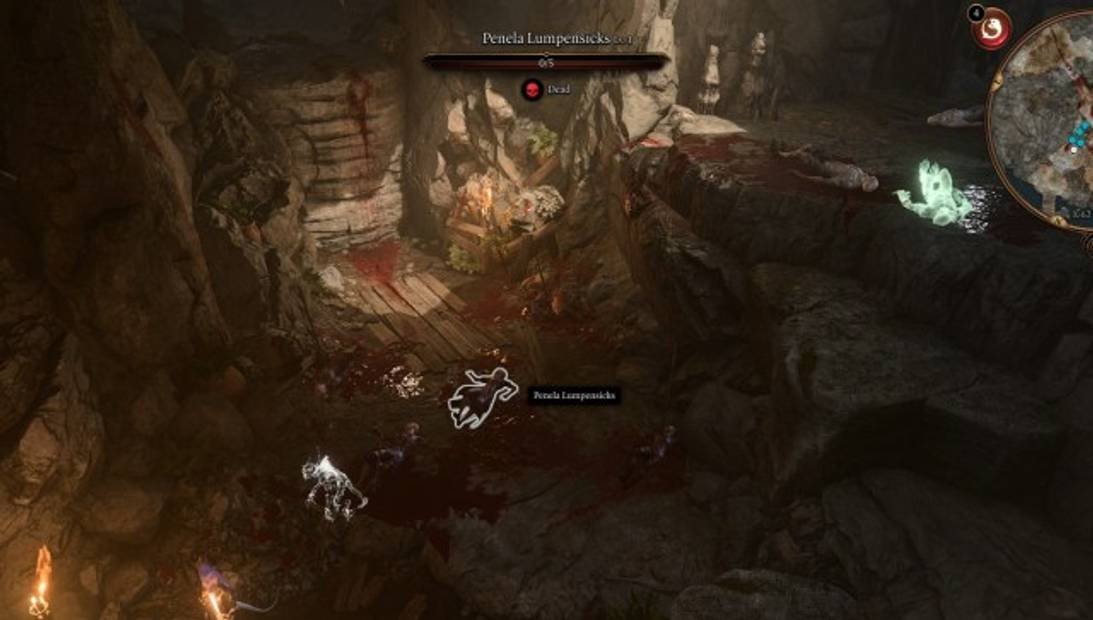
Descend into the darkest depths where the lifeless bodies lie. Although not crucial for the quest at hand, for those seeking extra adventure, take a closer look at the woman standing amidst the macabre scene. Her name is Penela Lumpensicks, and she holds a precious item in her grasp – none other than Dribble’s Torso. This serendipitous discovery sets the stage for the captivating side quest, “Find Dribbles the Clown”. Brace yourself for a thrilling journey filled with twists and turns!
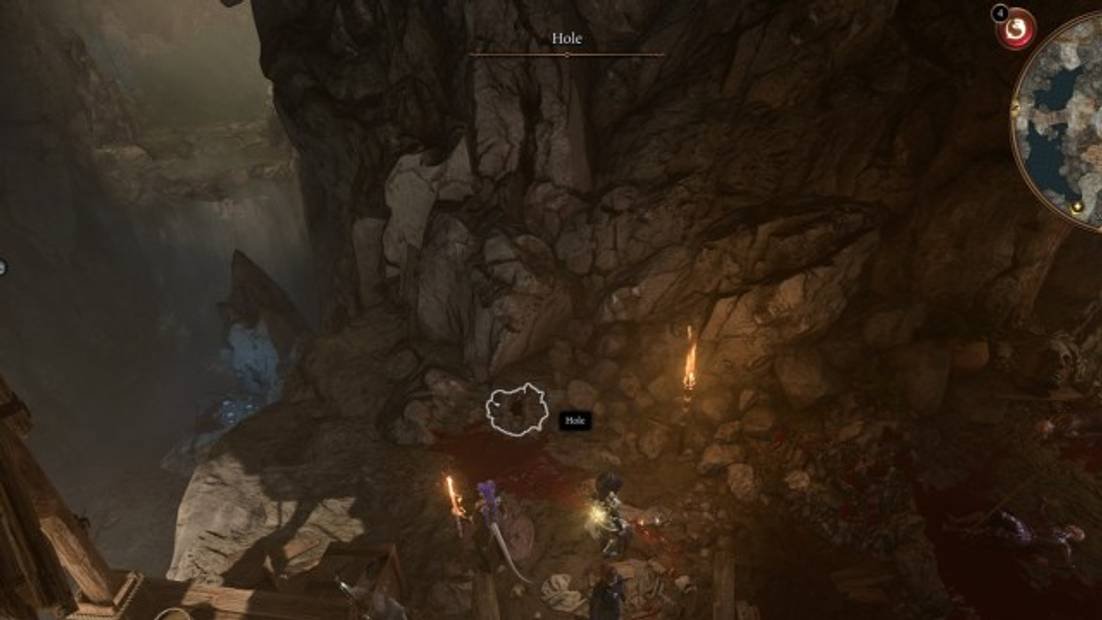
If you’re on the hunt for the murder weapon, make your way towards the majestic waterfall and the sturdy wood plank platform on the left side. As you approach, cast your gaze to the right, where you’ll notice a hidden gem near the rock wall – a mysterious hole. Don’t hesitate to delve into the depths of this enigmatic cavity, for within it lies the key to unraveling the truth – the one and only Stillmaker, the murder weapon.
Exploring the captivating world of Baldur’s Gate 3 is an adventure in itself. As you progress, you come across intriguing puzzles and hidden secrets, like the key with a flower motif. But where exactly should you use this mysterious key?
Heading out of the Temple of the Open Hand, make your way to the main street. Your destination is Fraygo’s Flophouse, located just beyond the South Span Checkpoint to the north of the temple. To reach the checkpoint, simply follow the main road.
As you arrive at the checkpoint, a Gauntlet will confront you, demanding proof of your ability to afford city living. The cost is a mere 200 gold, which is not too steep. However, if you choose all the available options except paying the 200 gold, a group of Ironhand Gnomes will attack the guards, creating the opportunity for you to dash past them and enter the city.
Once within the city, continue along the path, and you will spot a grand house on your left – that’s Fraygo’s Flophouse. Ascend the staircase to the second floor, where you’ll discover a room filled with chests. Direct your camera to face east, towards the street you just departed from, and lo and behold, you’ll notice a ladder leaning against the door.

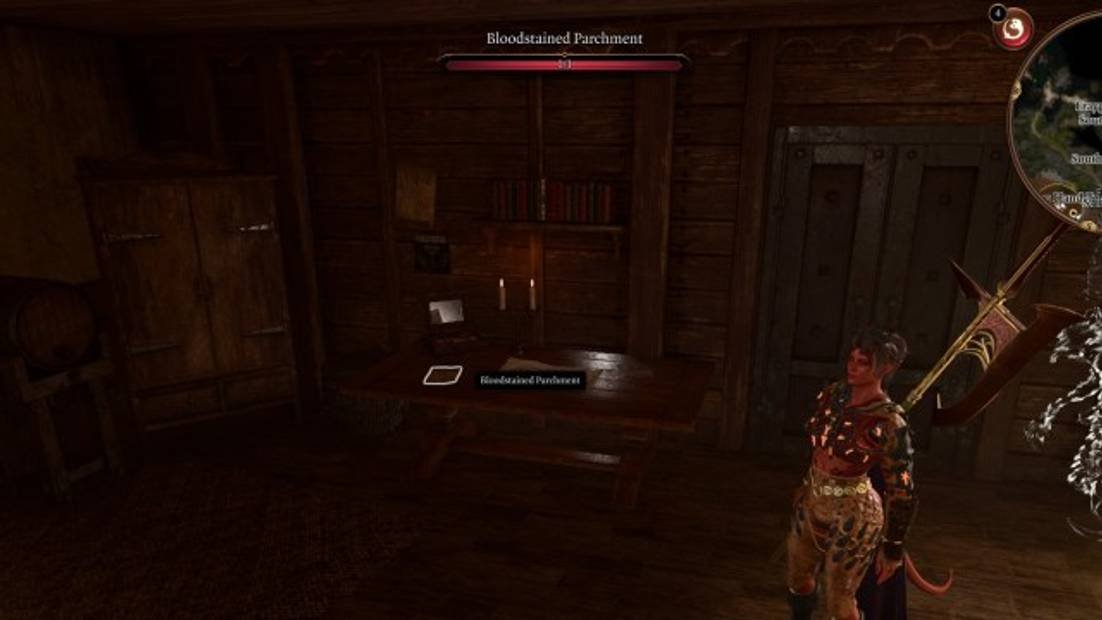
Take your ascent up the ladder, and you’ll uncover the wonders of an enchanting attic.
Engage with the wardrobe, and you’ll unveil its true nature as a clandestine portal, granting you entrance into a concealed chamber of mysteries.
Discover the mysterious Bloody Parchment tucked away on the table next to the wardrobe. As you explore its contents, you will come across a chilling revelation – an assassin’s list. On this dreaded list, you will find the names of none other than Father Lorgan and Dribbles the clown. Brace yourself for a thrilling journey filled with suspense and intrigue!
But hold on! Before you rush off, make sure to examine the bed and roll a perception check. Then, follow it up with an investigation check. If you succeed, you’ll uncover another Key adorned with a beautiful Flower Motif. Although it may not play a major role in this quest, it’s always exciting to find hidden treasures!
Once you have the list and all your other clues, head back to the flying elephant, who can now be found at the Sharess’ Caress – a building conveniently located directly across from Fraygo’s Flophouse. Look for them upstairs near the stairs.
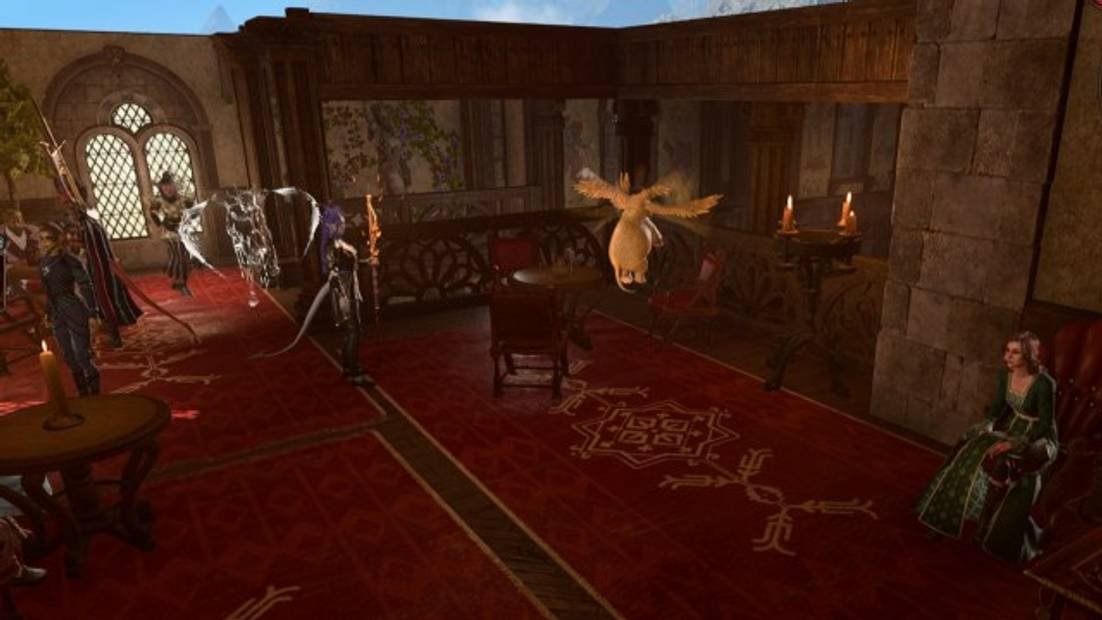
If you’ve been following this fantastic guide, you now possess substantial evidence to crack the case wide open. Your dedication and perseverance have paid off, and as a reward, you’ll be granted access to the captivating Lower City. Here, you can delve deeper into the intricate web of this conspiracy.
While navigating through the intriguing Sharess’ Caress, you might as well seize the opportunity to apprehend Arfur, the central character in the thrilling ‘Investigate the Suspicious Toys’ quest. This exhilarating encounter will add an extra layer of excitement to your gaming experience.
Leave a Reply
You must be logged in to post a comment.