The Red Mile, an extraordinary event taking place on the mesmerizing planet of Porrima III within the captivating world of Starfield, holds the potential to provide unforgettable experiences. And the journey begins when you stumble upon an intriguing task offered by none other than Vicente, situated in the captivating confines of The Well, found in the vibrant New Atlantis section.
Despite being advised by Vicente to refrain from engaging with others, curiosity may get the better of you. What if, against all odds, you choose to defy the instructions and strive to emerge victorious in the competition, standing alone as the ultimate champion?
Embarking on the Red Mile Run and Securing Victory in Starfield
If you choose to embark on this thrilling journey before Vicente’s task in New Atlantis, gear up for an exhilarating experience. Prepare yourself for a series of captivating Grav jumps, navigating through various systems until you ultimately find yourself in Porrima – the very system where the enchanting planet of Porrima III resides.

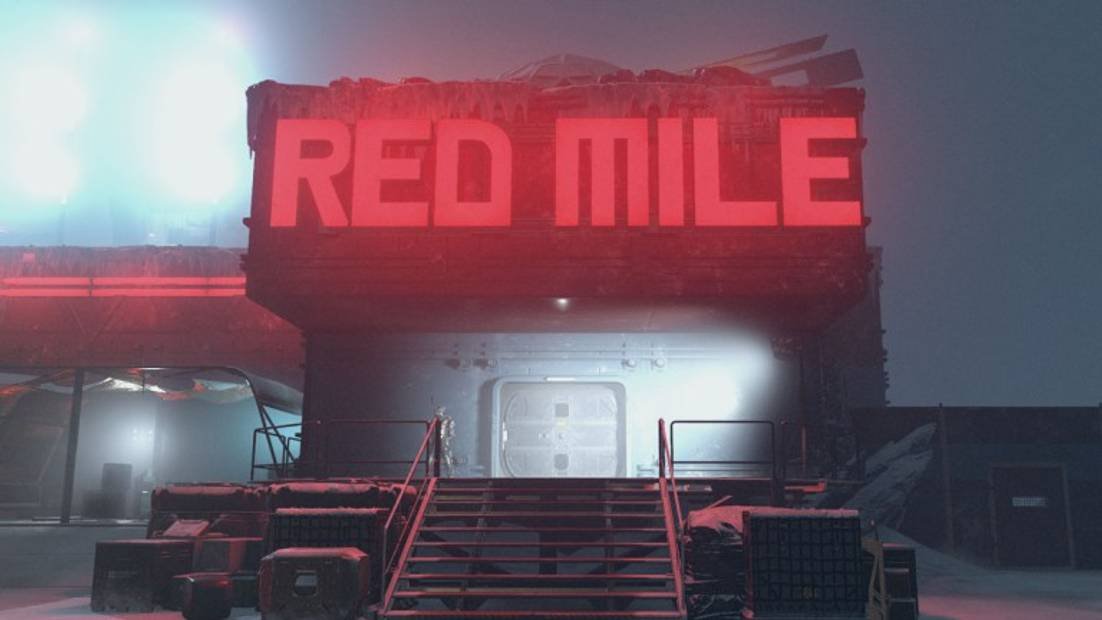
Prepare yourself for an exhilarating adventure on Porrima III! Your first stop is the famous Red Mile bar, where you’ll meet Mei, the brilliant mind behind the Red Mile Run. This one-of-a-kind challenge is not to be missed. The Red Mile Run is a thrilling race that requires you to reach the beacon in the outer snowy plains and make it back to the bar in one piece. But hold on tight, because the Red Mile Maulers will be out to get you!
Before embarking on this daring journey, make sure you stock up on essential medical items and ammunition for your best weapons. Trust me, you’ll need them. To increase your chances of success, employ some clever strategies along the Red Mile Run Route in Starfield. Avoid the treacherous middle path and stick to either the left or right paths. And don’t forget to save your progress with a quicksave before starting the mile. Lastly, keep plenty of Amp meds handy to give yourself a speed boost when necessary.
Once you’ve agreed to participate, pass through the doors adorned with signs warning you about the potential hazards ahead. Make the mission your primary objective so you always know where you’re heading (unless it was already set for you automatically). As soon as you step foot on the track, brace yourself for encounters with the fearsome Red Mile Maulers.
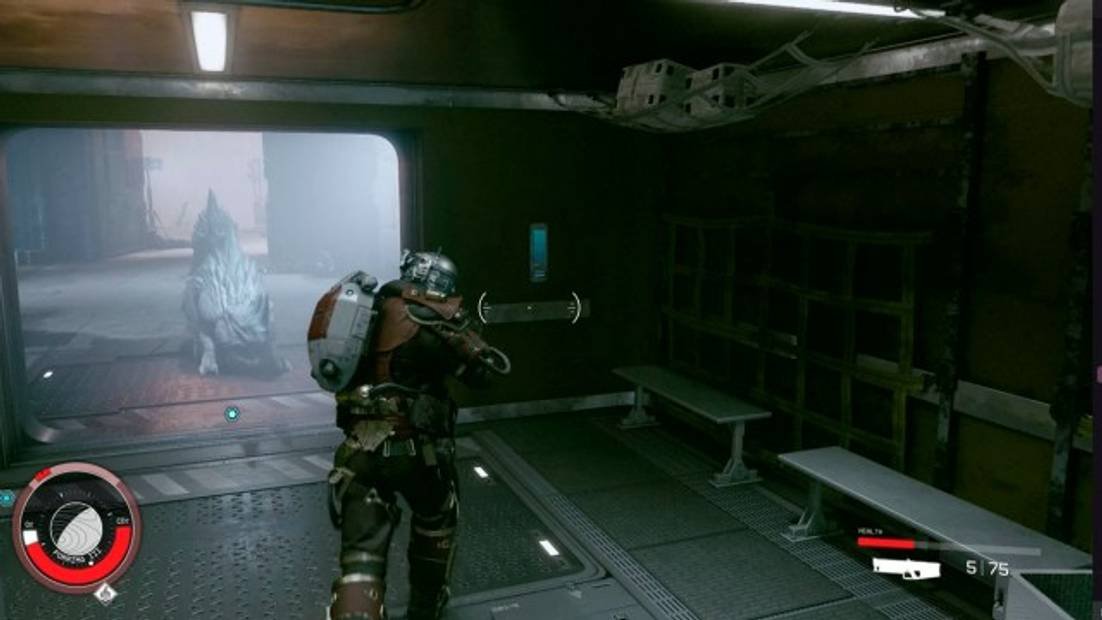
These formidable enemies are not to be underestimated. They can rain down explosive projectiles from a distance, making them a formidable force to reckon with. The Red Mile is swarming with them. Luckily, your loyal companion will be right by your side, offering their unwavering support throughout this challenge.
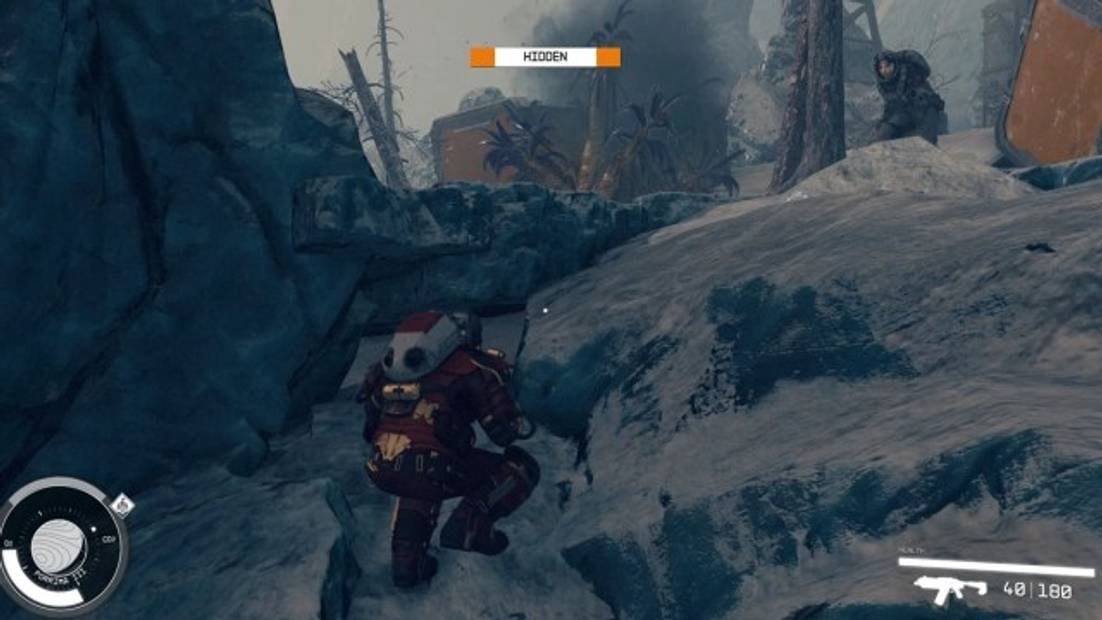
The key to survival is to minimize direct confrontation with the Maulers. Engaging them head-on is a risky endeavor, as they are incredibly resilient and can easily tear you limb from limb. Instead, utilize your stealth skills and sneak your way along the sides of the track towards the beacon. Make use of the Scan mode to spot the Maulers from a distance. If you’re adept in Stealth, keep an eye on the Stealth bar to ensure you remain effectively hidden from their prying eyes.
When it comes to combat, you’re bound to encounter a few adversaries along the way. However, with the right strategy, you can come out on top. In our experience, laser weapons proved to be more effective than pistols or rifles. So, if you have a laser weapon at your disposal, make sure to use it. It’s also beneficial to have a few points in the Lasers Skill to enhance your performance in combat.
Now, here’s a valuable tip: take cover whenever possible. We discovered that the left side path was relatively safer during our encounters. Not only did it provide us with some natural barriers, such as mountains, but it also allowed us to make use of my booster pack to cover larger distances in a single jump. Just remember to keep an eye on your CO2 gauge while running from Maulers, as it can fill up quickly if you’re not careful.
Reaching the beacon in your adventure is an exhilarating moment. However, brace yourself, because as soon as you touch it, an imposing Mauler may make a sudden attack. But fear not, for with a quick response and nimble feet, you can easily outpace this formidable foe. This is where the real excitement begins!
During our daring exploit, our trusty crewmate Sarah happened to draw the attention of all the Maulers for reasons unknown. Seizing this advantageous situation, we swiftly sprinted away, leaving her to valiantly hold her ground. Perhaps luck will be on her side next time!
Curiously, and through some mysterious means, Sarah managed to survive the relentless assault. Our winning strategy involved cleverly using our crewmates as distractions for the Maulers while making a swift return to the elevator. Yes, you guessed it – the key to triumph is sacrificing them to the beasts and making a mad dash! No need to lend them a backward glance, as they will magically rejoin us as soon as the ordeal is over. The only thing that really matters is ensuring our survival.
As you step into the elevator, a sense of relief washes over you. You catch up with Mei once again, and she congratulates you on successfully completing your first Red Mile. Despite a few bumps along the way, you made it through in one piece (well, mostly), earning yourself some fantastic rewards. Mei rewards you with the powerful Brute Force shotgun, 2500 Credits, a generous supply of ammo, and 100XP. And don’t worry, your trusty allies will be waiting for you at the finish line as if nothing ever happened.
If you have a competitive spirit, you can challenge yourself to beat your own records and claim a place at the top of the Red Mile Run Leaderboard. This is especially important if you are following the Freestar Rangers questline. Without revealing too much, let’s just say that completing The Red Mile Run during the On the Run questline is a key requirement. So lace up your running shoes, because there’s no better time to tackle this challenging race!
The Reward for Reaching the Top of the Leaderboard
If you manage to secure the top spot on the Red Mile Run Leaderboard, there is indeed a “reward” waiting for you. However, we highly advise against investing too much time and effort into this endeavor. While it may be tempting to strive for the highest score, the reward itself is disappointingly lackluster. You will receive the Desperation rifle as your prize. Unfortunately, this weapon falls short in terms of power and pales in comparison to other options available in the game. Similar firearms can easily be found throughout your exploration of the game’s vast world.
Desperation Starfield Stats
- Damage: Phys (22)
- Ammo: 11mm Caseless
- Clip Size: 15
- Fire Rate: 134
- Range: 19
- Accuracy: 71.9%
- Mass: 3.20
- Value: 23594
- Mods: 6/8
Brute Force Starfield Stats
Let’s take a closer look at the impressive ballistic Pacifier shotgun called Brute Force:
- Damage: Phys (204)
- Type: Ballistic
- Ammo: 15×25 CLL Shotgun Shell
- Clip Size: 11
- Fire Rate: 20
- Range: 11
- Accuracy: 57.1%
- Mass: 4.40
- Value: 20883
- Mods: 5/6
Leave a Reply
You must be logged in to post a comment.